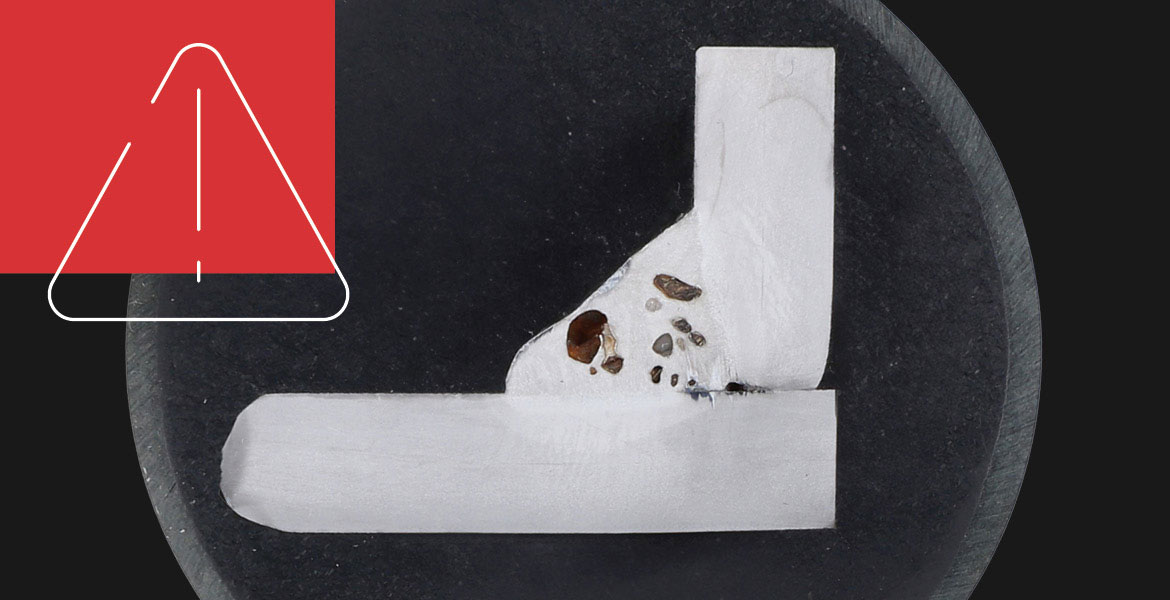
Porosity, cracks, undercuts: what may sound like a minor imperfection at first has consequences far beyond mere aesthetics. Welding defects can compromise the quality and structure of the joint, potentially leading to component failure in the worst case scenario. Some defects are immediately visible, while others go undetected for a long time. We’ll show you the 10 most common defects along with expert tips on how to avoid them.
What is a welding defect?
A welding defect is an imperfection in or on the weld that exceeds the permissible limit values and may impair the component’s function.
It is important to distinguish between a weld imperfection—known as a discontinuity—and an actual defect: “A discontinuity initially refers only to a deviation from the desired weld seam profile, yet still remaining within the permissible standard limit values. Only when these limits are exceeded does a discontinuity become a defect requiring correction,” explains Günter Doblinger, an expert on welding standards.
Welding discontinuity vs. weld defect: what the standards say
Standards and regulations define whether a discontinuity is classified as a welding defect or not. They stipulate which deviations are permissible and at which point a weld seam is considered defective. Examples include EN ISO 5817 for steel or EN ISO 10042 for aluminum, which are widely used in Europe and internationally. In the US, the equivalent acceptance criteria are found in AWS D1.1 (steel) or AWS D1.2 (aluminum), while AWS A3.0 defines the difference between a discontinuity and a defect.
A practical example: According to EN ISO 5817 (quality level B), an undercut 0.2 mm deep may still be permissible for a 4 mm-thick steel joint. However, as soon as it reaches 0.3 mm, the permissible limit is exceeded, and the imperfection becomes a defect. Often just a few tenths of a millimeter can determine whether a weld seam meets the requirements or is considered defective.
The 10 most common types of welding defects
| Defect | Description | |
|---|---|---|
| Porosity | 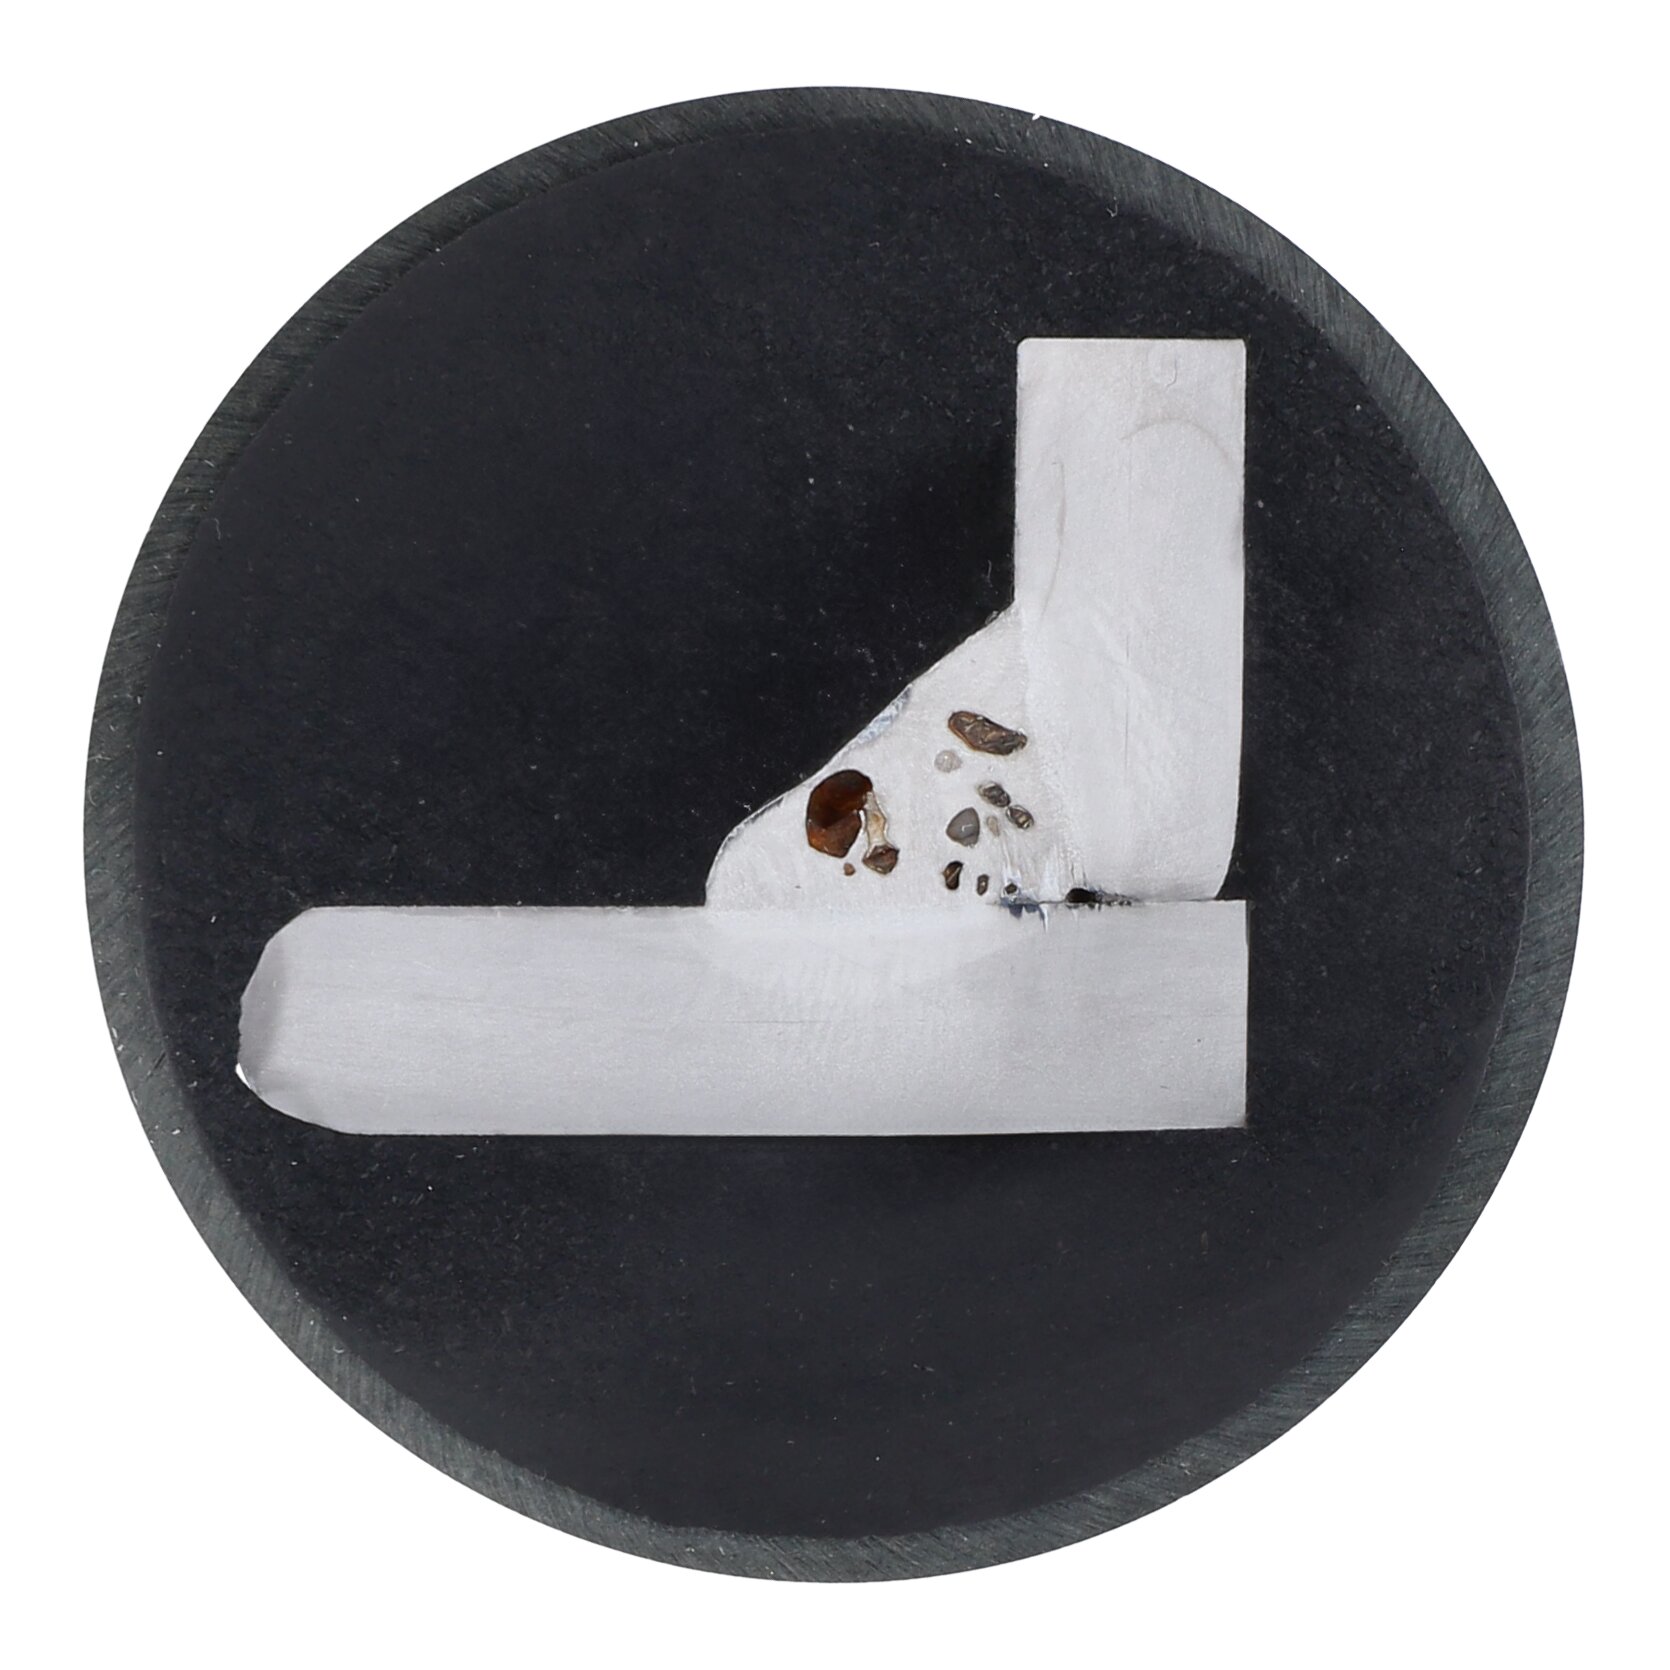 | Gas inclusions in the seam, which are visible on the surface or hidden inside the weld. |
| Slag inclusions | 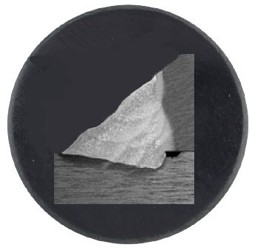 | Slag inclusions in the weld seam that compromise the homogeneity of the joint. |
| Lack of penetration or fusion | 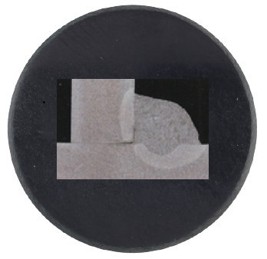 | Incomplete fusion between the weld metal and the base material. |
| Cracks | 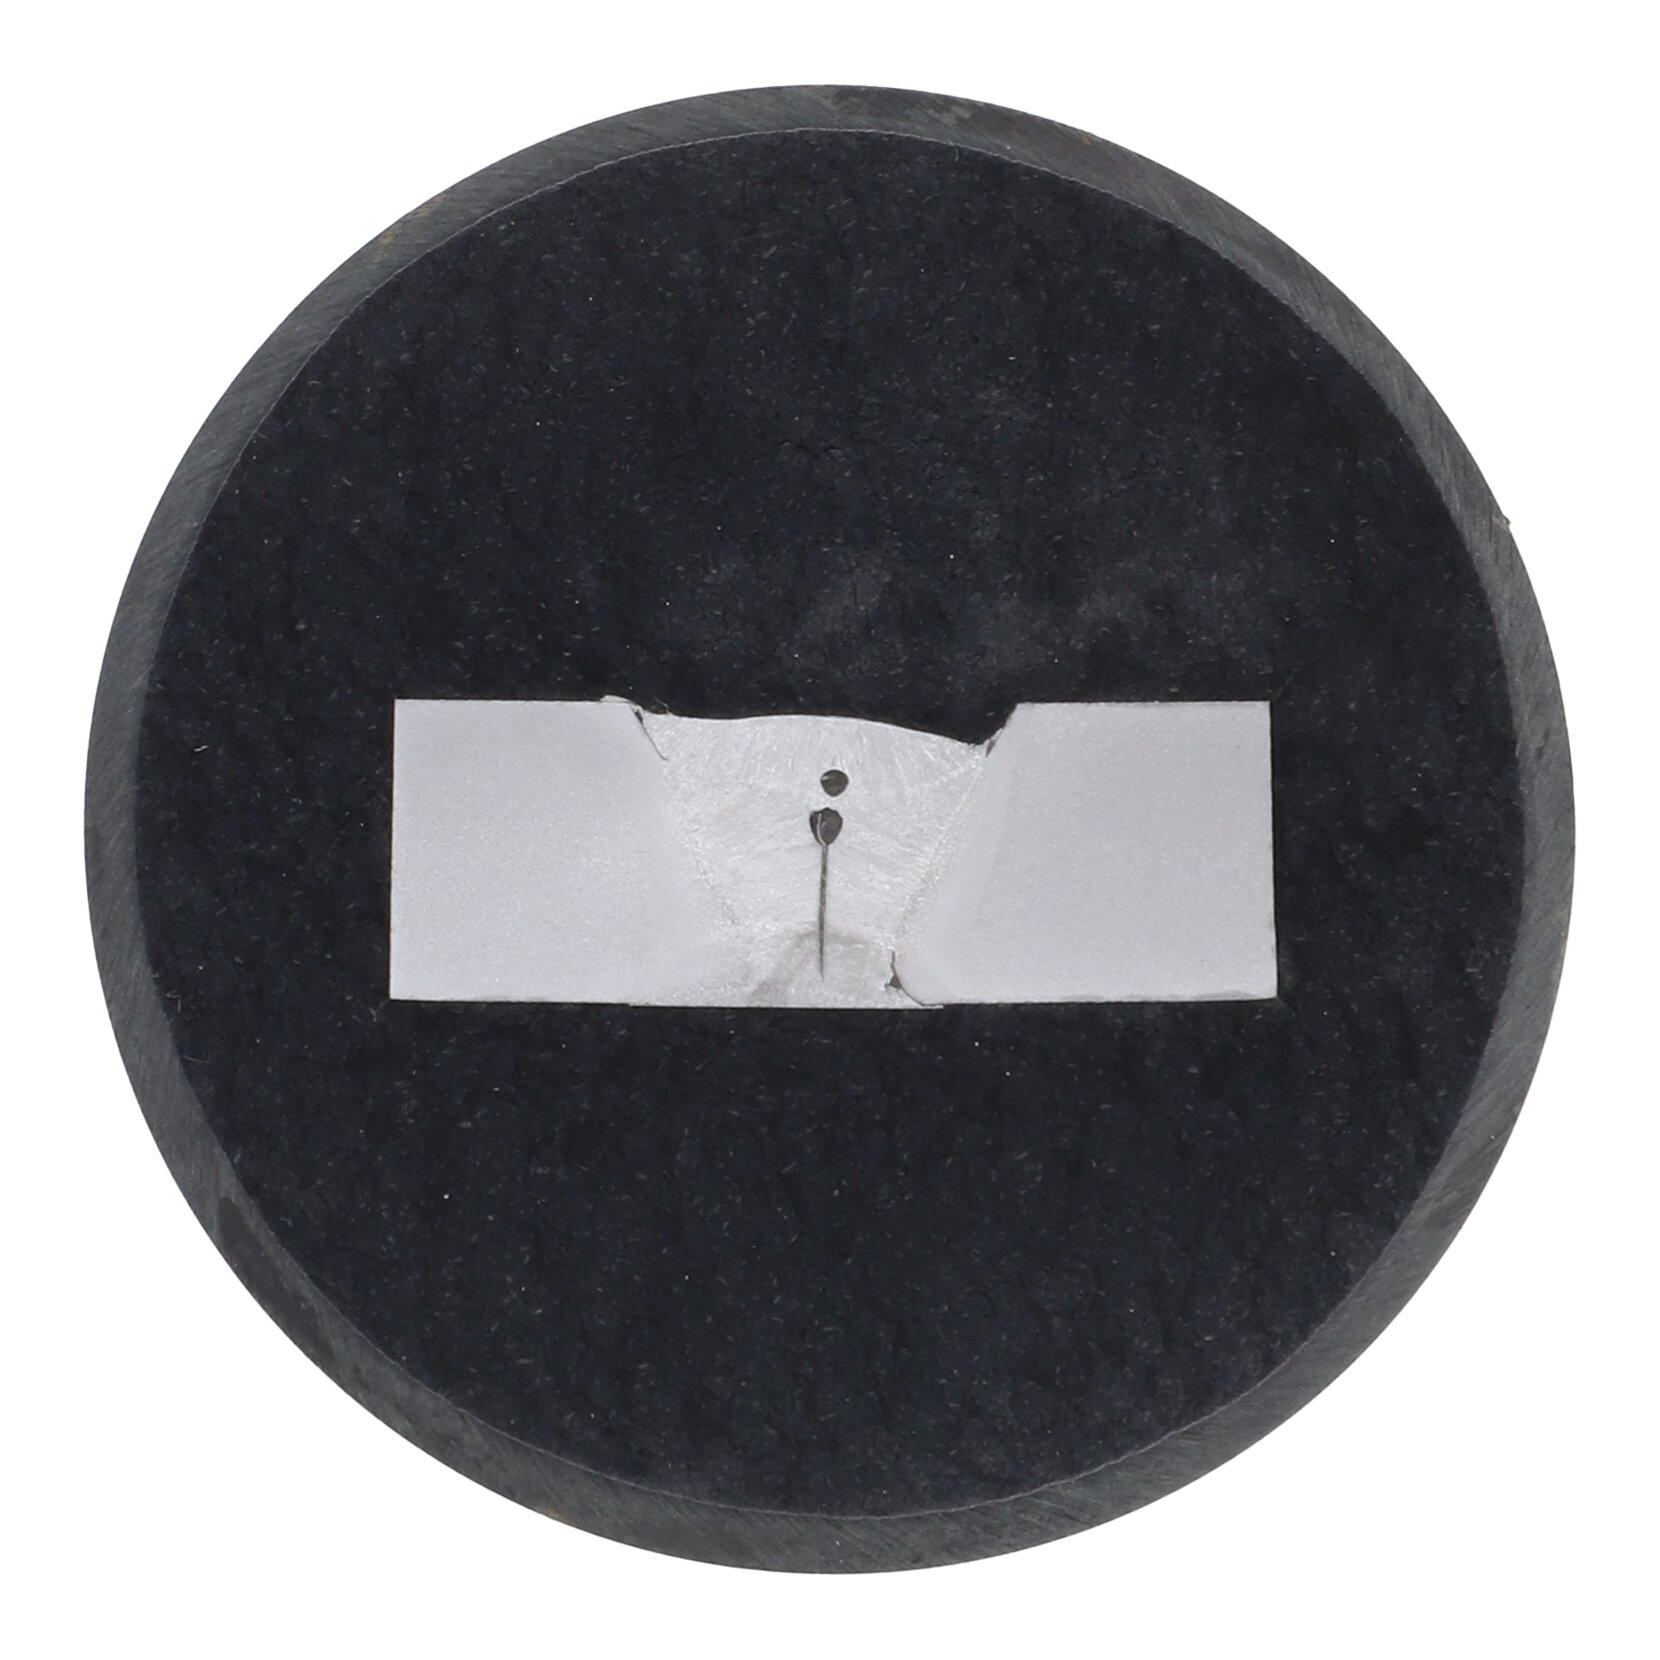 | Schisms in the weld metal that compromise the load-bearing capacity and safety of the welded joint. |
| Undercuts | 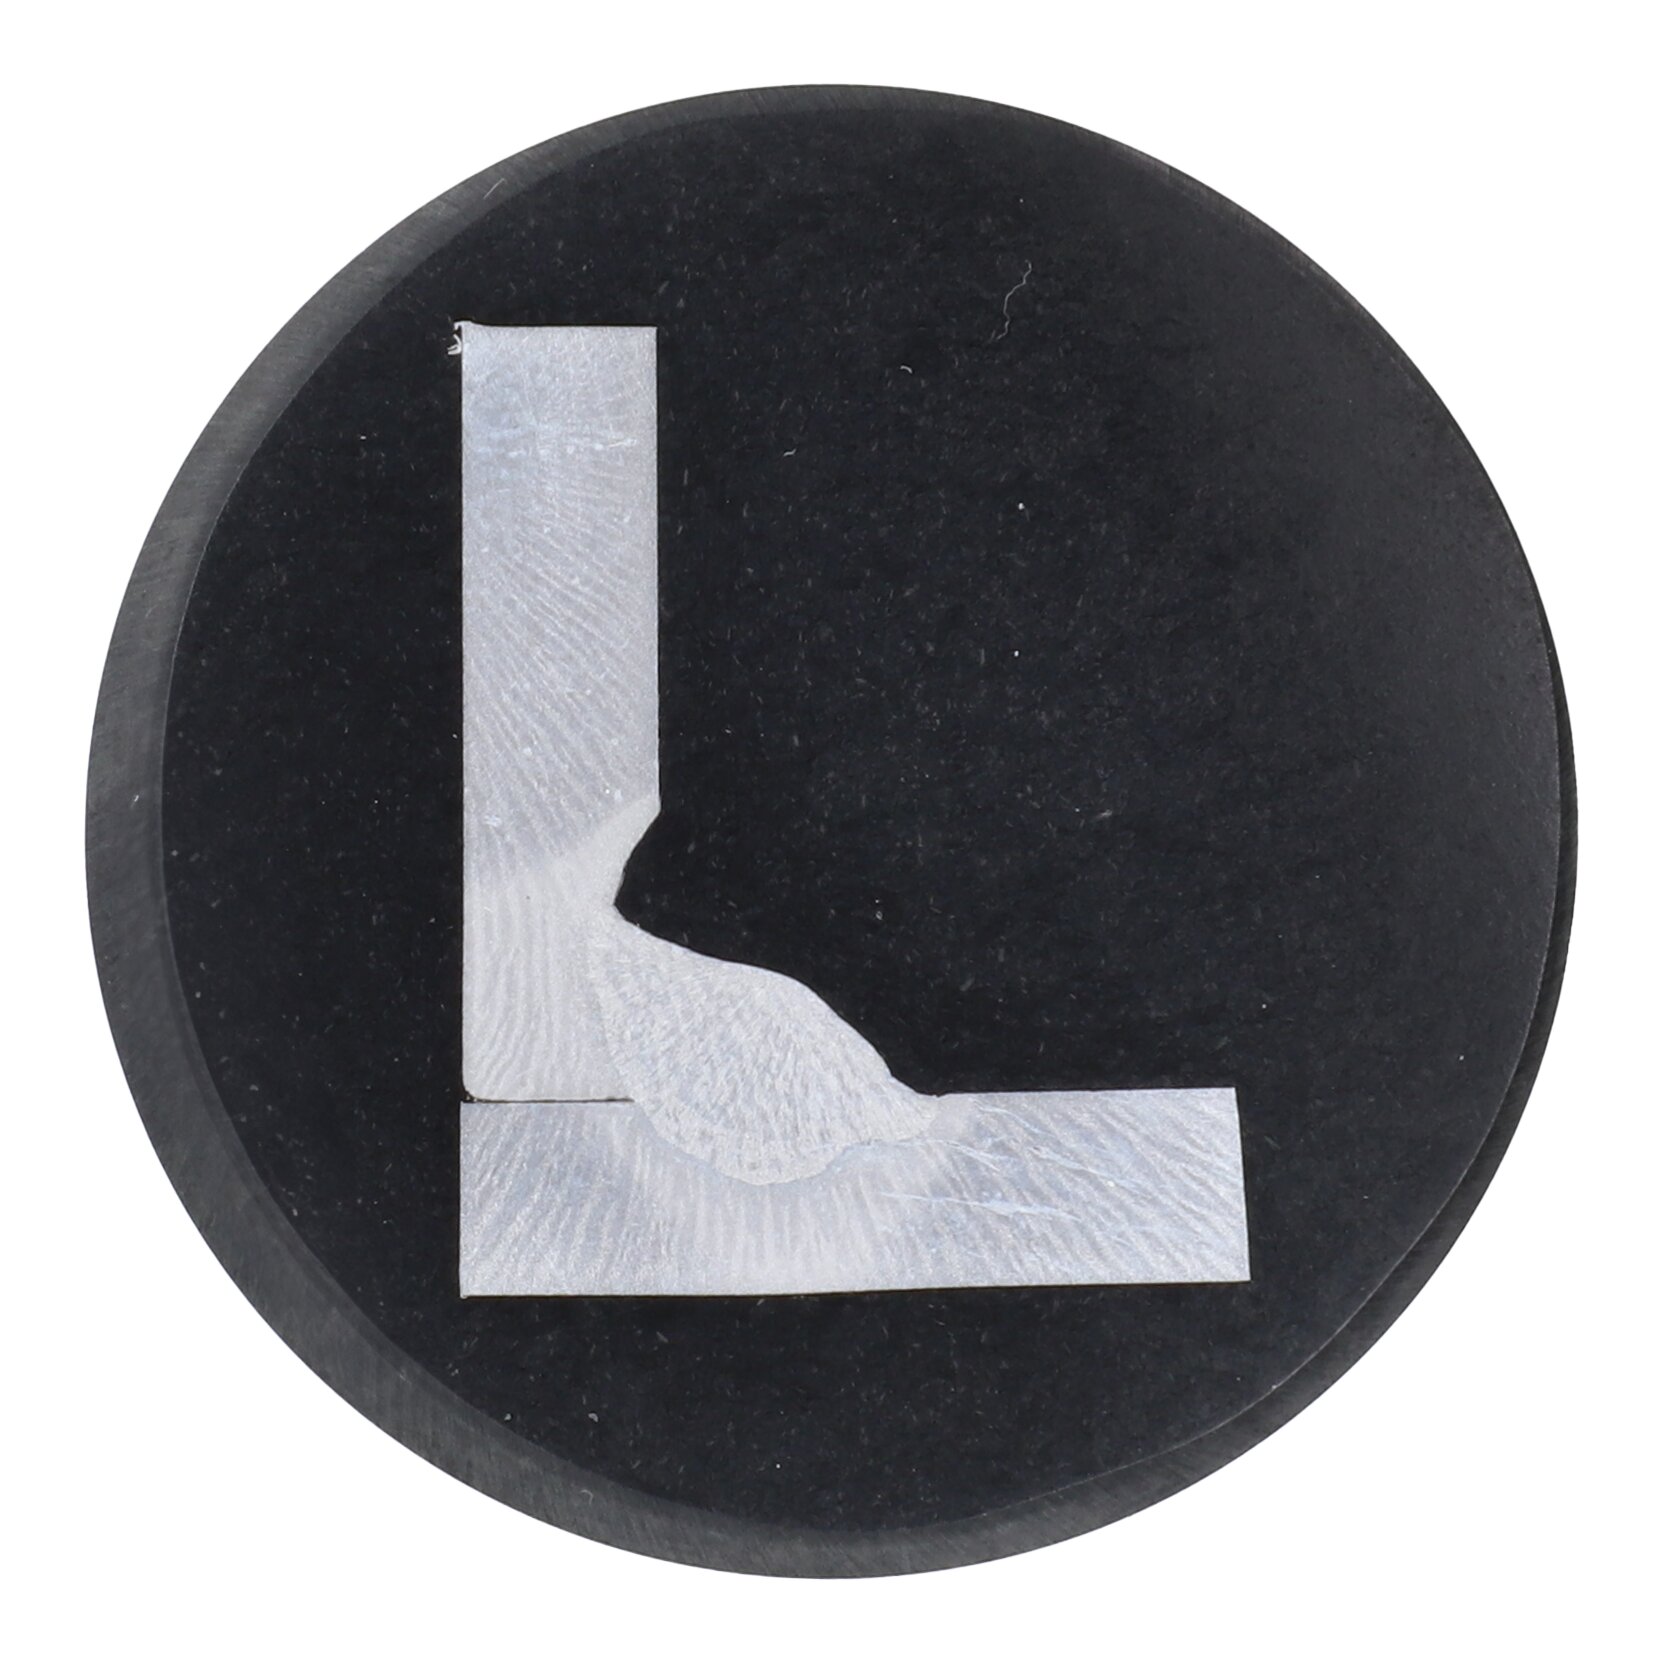 | Groove-like indentations at the interface between the weld seam and the base material, as well as between the individual weld beads. |
| Excessive penetration | 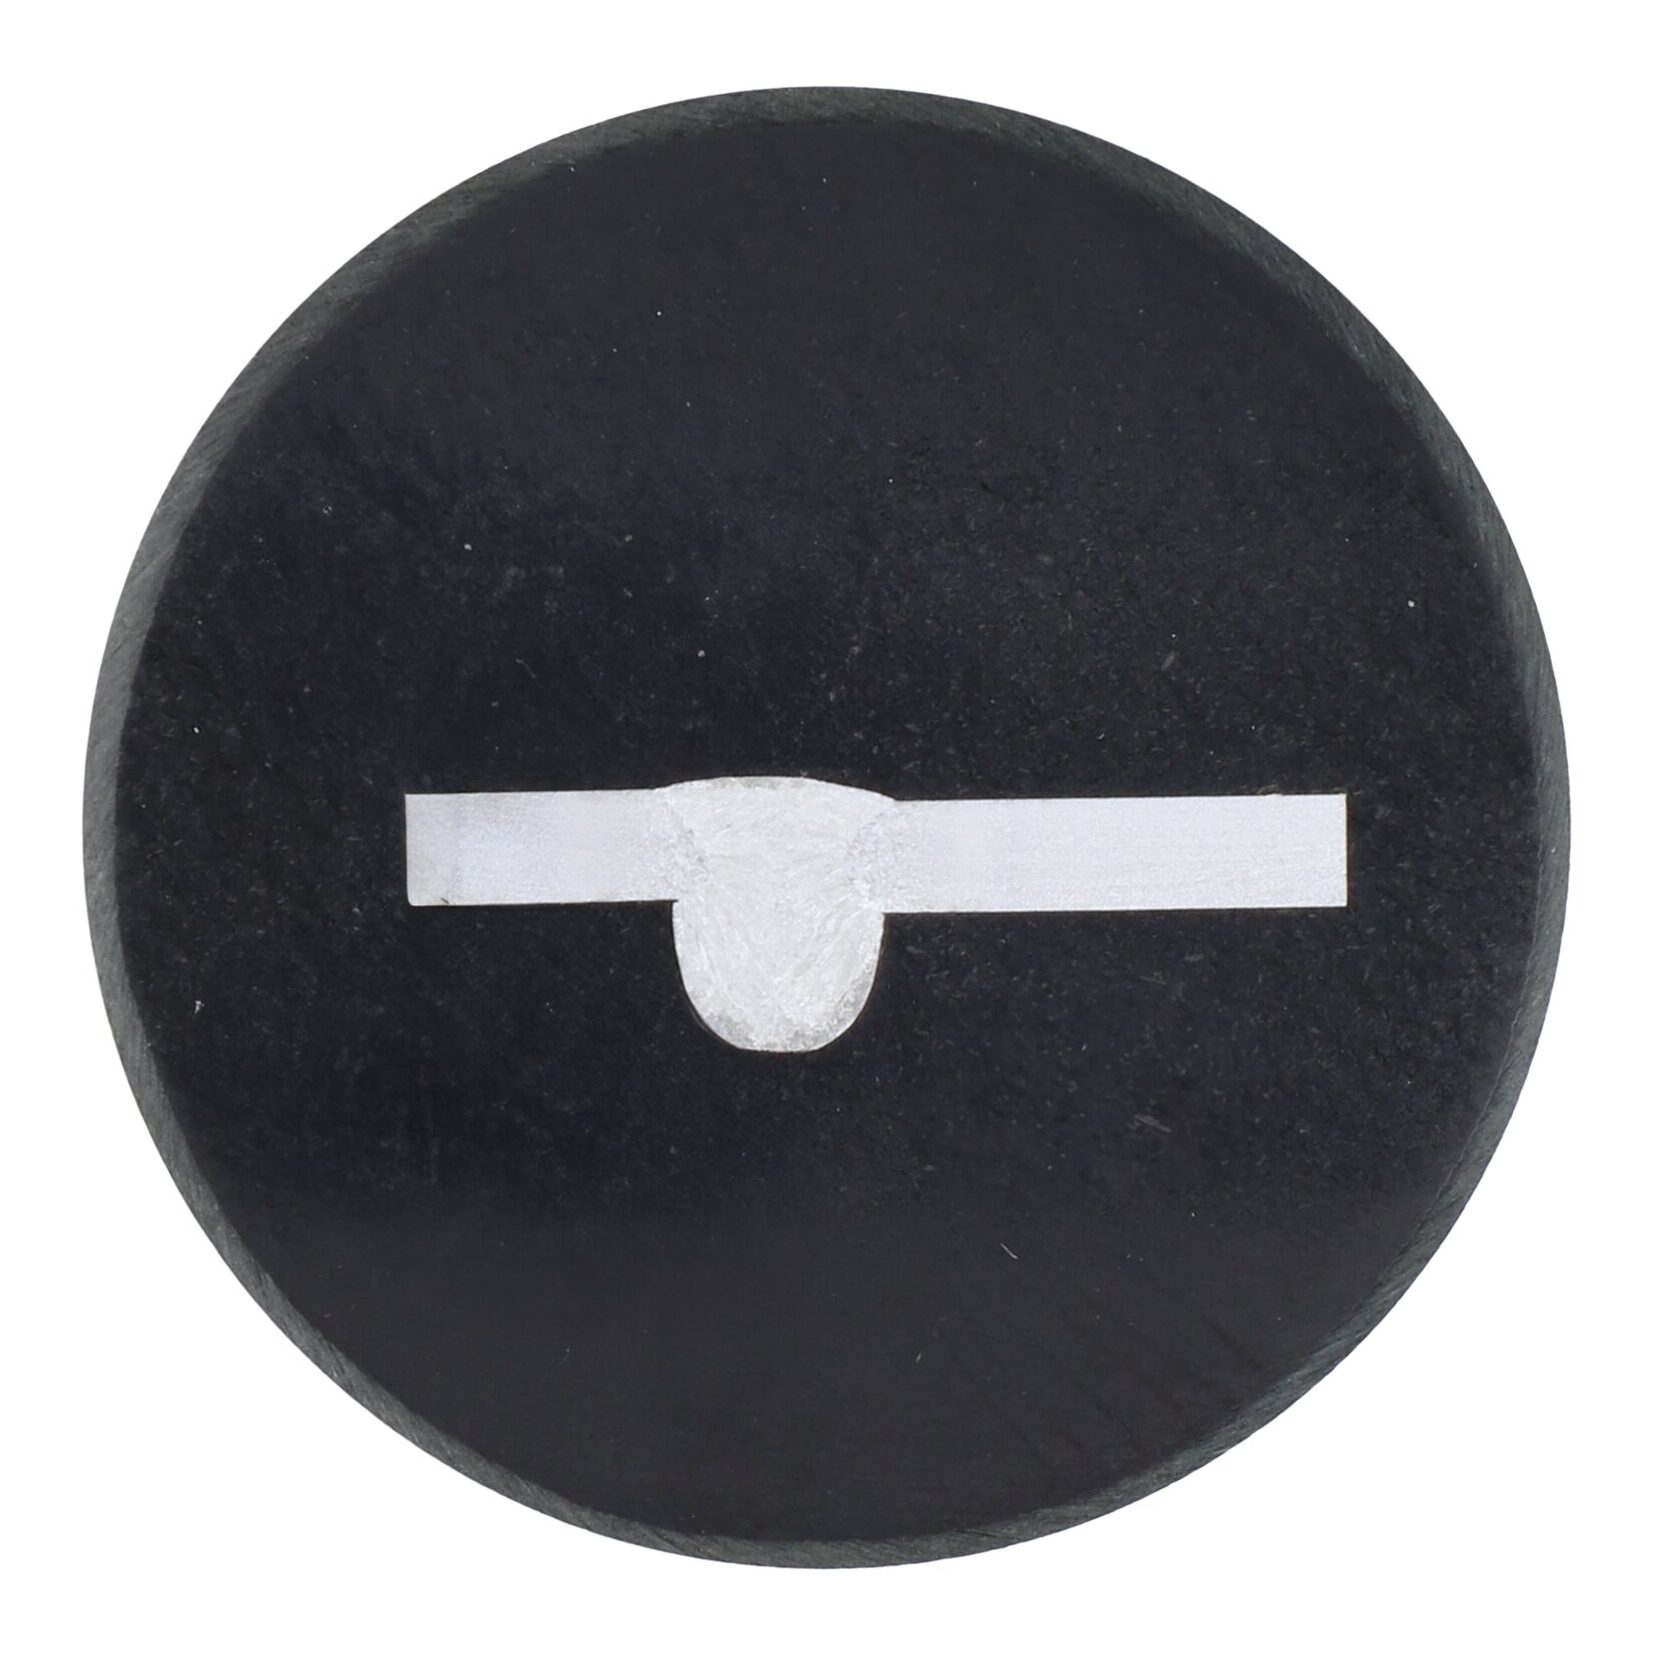 | Excessive penetration of the weld metal through the root of the weld, resulting in bulging on the root side. |
| Crater cracks |  | Cracks in the end-crater of a weld seam caused by shrinkage stresses during cooling. |
| Insufficient penetration | 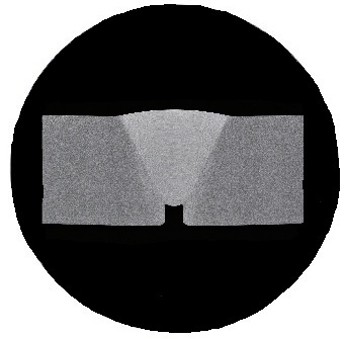 | Incomplete fusion of the root pass and a lack of bonding in the root area. |
| Excess reinforcement | 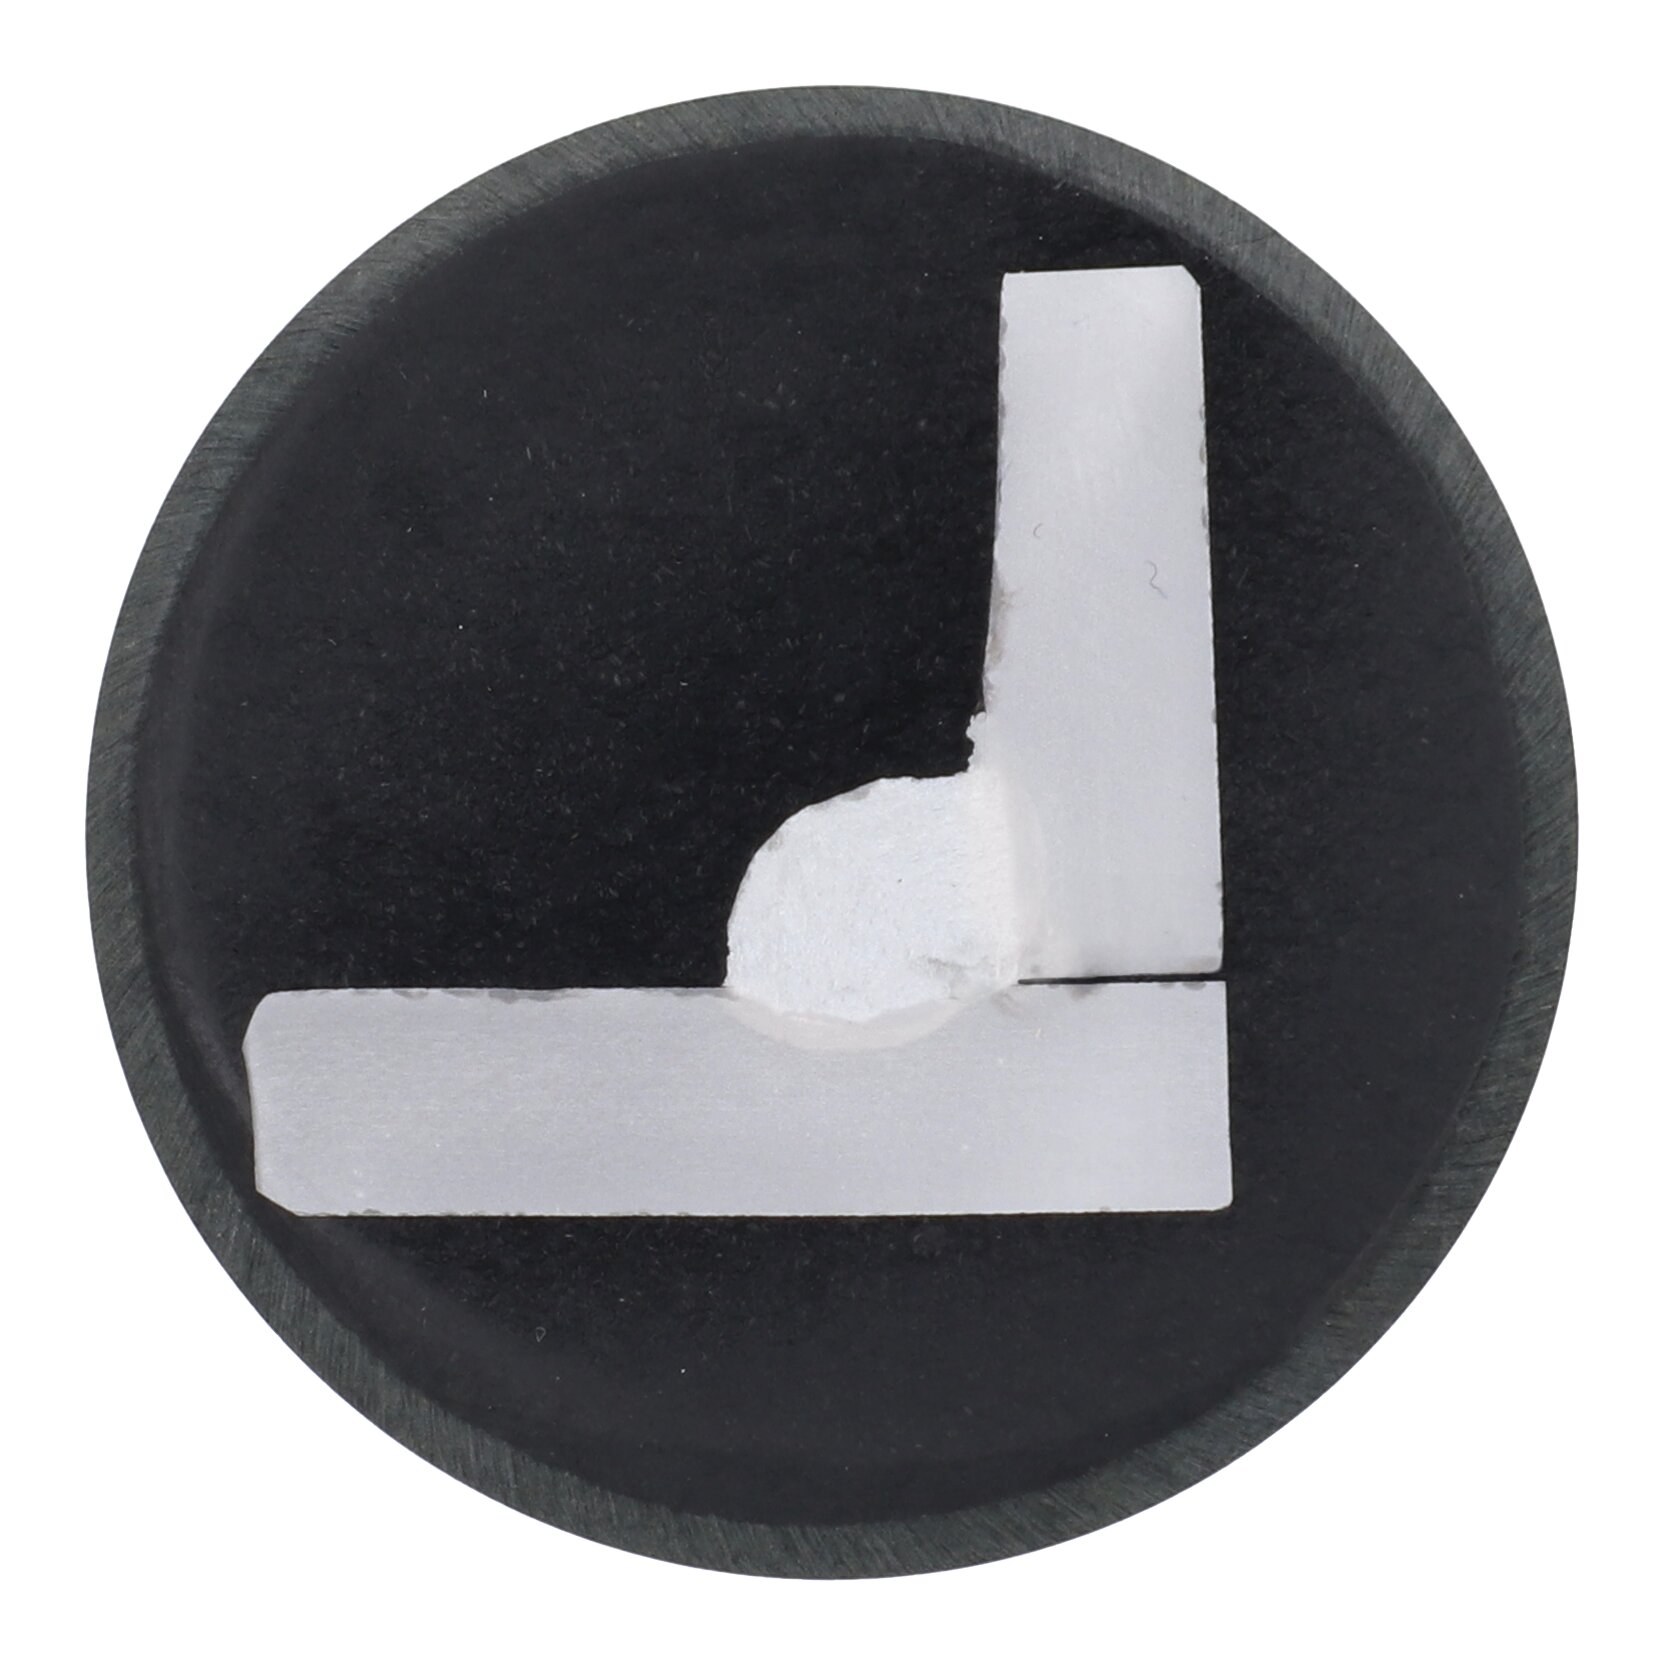 | Excessive weld metal application with a seam that extends beyond the required dimension. |
| Welding spatter | 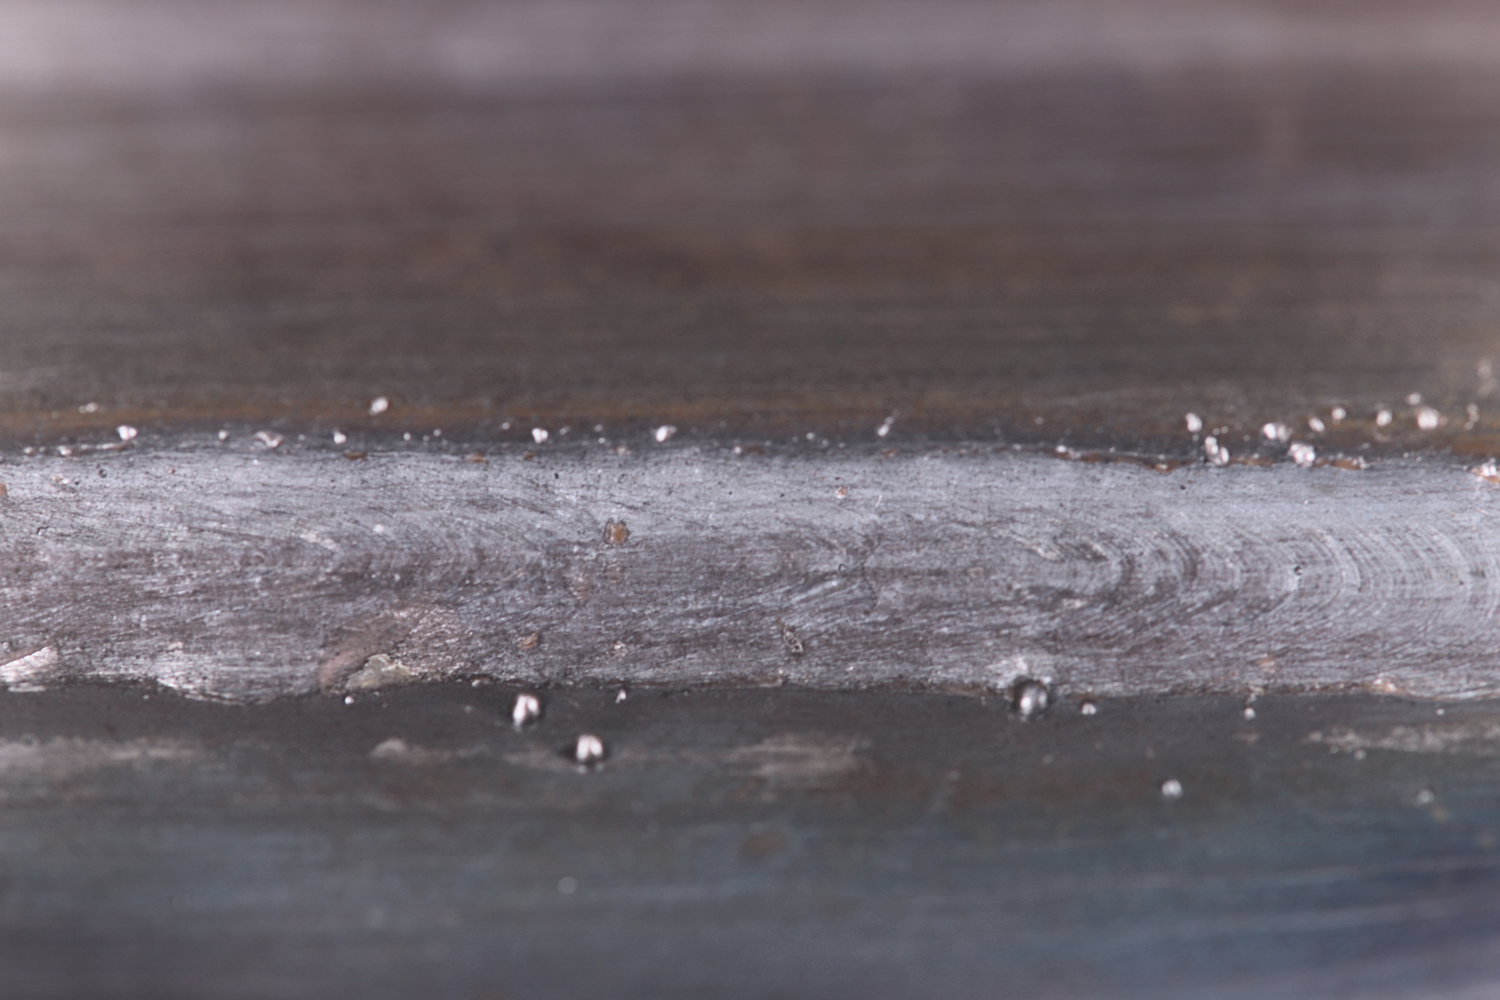 | Metal particles ejected during welding that adhere to the workpiece. |
Causes and prevention of welding defects
1. Porosity
Porosity may be visible on the surface and to the naked eye, or it may be located inside the weld itself. Internal porosity becomes visible only through an X-ray inspection, for example.
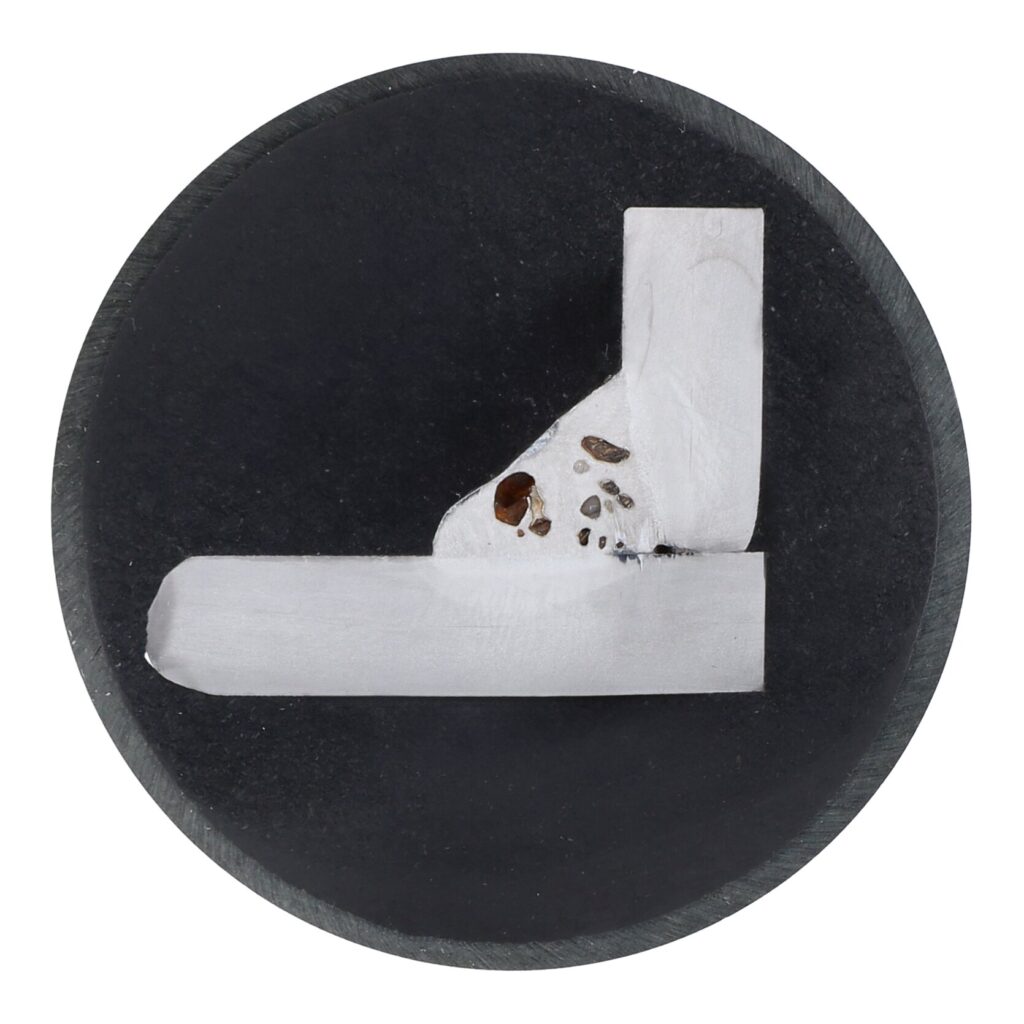
Porosity in a fillet weld: the gas inclusions are visible as dark voids in the micrograph.
Causes
Porosity forms when gases become trapped in the weld metal during solidification. This may be due to:
- Dirty, greasy, or oily surfaces
- Residues from coatings, primers, or welding protective sprays
- Insufficient amount of shielding gas
- Excessive amount of shielding gas causing turbulence
- Drafts in the welding area
How to prevent porosity
Two important factors are cleanliness and the correct amount of shielding gas. For the latter, the rule of thumb is wire diameter x 10. If there isn’t enough shielding gas, oxygen from the air can seep in. Too much shielding gas can cause turbulence, which in turn draws atmospheric oxygen into the weld pool.
In addition, the expert recommends avoiding drafts. Especially on construction sites or in buildings with open doors, drafts can compromise the gas shield, even if they are barely noticeable.

Practical tip: “Cleanliness is more important than anything else. The surface should be bare metal, free of grease, oil, and coatings. If you follow this tip, you’ve already eliminated the main cause of defects,” explains Doblinger.
2. Slag inclusions
Slag inclusions are non-metallic residues that become trapped in the weld seam during welding. They occur primarily in processes that produce slag, such as manual metal arc welding and MIG/MAG welding with a flux-cored wire. Since inclusions compromise the homogeneity of the weld, they can reduce the strength of the joint and, in the worst-case scenario, lead to cracks developing later.
A macrosection shows slag inclusions between the weld layers as dark, non-metallic areas.
Causes
According to welding expert Günter Doblinger, slag inclusions often occur when slag from a previous layer was not completely removed and scale layers on the component surface were not sufficiently removed. Even during MIG/MAG welding with a flux-cored wire, the so-called front slag can be drawn into the weld pool and trapped within the seam.
Other common causes include:
- Welding power too low
- Arc too long
- Inadequate joint preparation
- Contamination or rust in the seam area
- Improper torch guidance during flux-cored wire welding
How to prevent slag inclusions
Here, too, the most important measure is working cleanly. Doblinger recommends thoroughly removing the slag after each weld layer and ensuring careful seam preparation. The surfaces to be joined should be clean and free of grease, rust, scale, and old slag residue.
The following measures are also helpful:
- Set the welding power high enough
- Keep the arc as short as possible
- When welding with a flux-cored wire, position the torch so that the slag remains behind the weld pool.
Practical tip: Even minor adjustments to the welding parameters or the torch guidance can be enough to prevent slag inclusions. That’s why if you notice any unusual seams, it’s a good idea to first check the settings and how the joint was prepared.
3. Lack of penetration or fusion
Both types of errors have a common cause (insufficient fusion between the weld metal and the base material), which is why they are often considered together in practice. Doblinger emphasizes: “These are defects that are not always immediately apparent from the outside but significantly compromise the strength of a welded joint.”
Macrosection with lack of penetration: the weld metal and the base material have not completely fused together.
Causes include:
- Unsuitable joint preparation
- Insufficient welding power
- An arc that is too long, a welding speed that is too high
- A root gap that is too small
- Improper torch guidance
How to prevent a lack of penetration and fusion
To achieve complete fusion, the joint preparation, welding parameters, and torch guidance must all be considered as a whole. Adequate welding power and a suitable welding speed are particularly important.
The following measures can help:
- Increase welding power
- Reduce the arc length
- Reduce the welding speed
- Adjust seam preparation to the material and material thickness
- Make sure the torch is guided evenly
4. Cracks (heat cracks)
Heat cracks are usually caused by unfavorable conditions during the solidification of the weld metal, often due to an unfavorable ratio between weld width and depth. If the seam is very narrow and deep, the risk of cracking increases. Even a very wide weld pool can lead to solidification cracks when the gap dimensions are large.
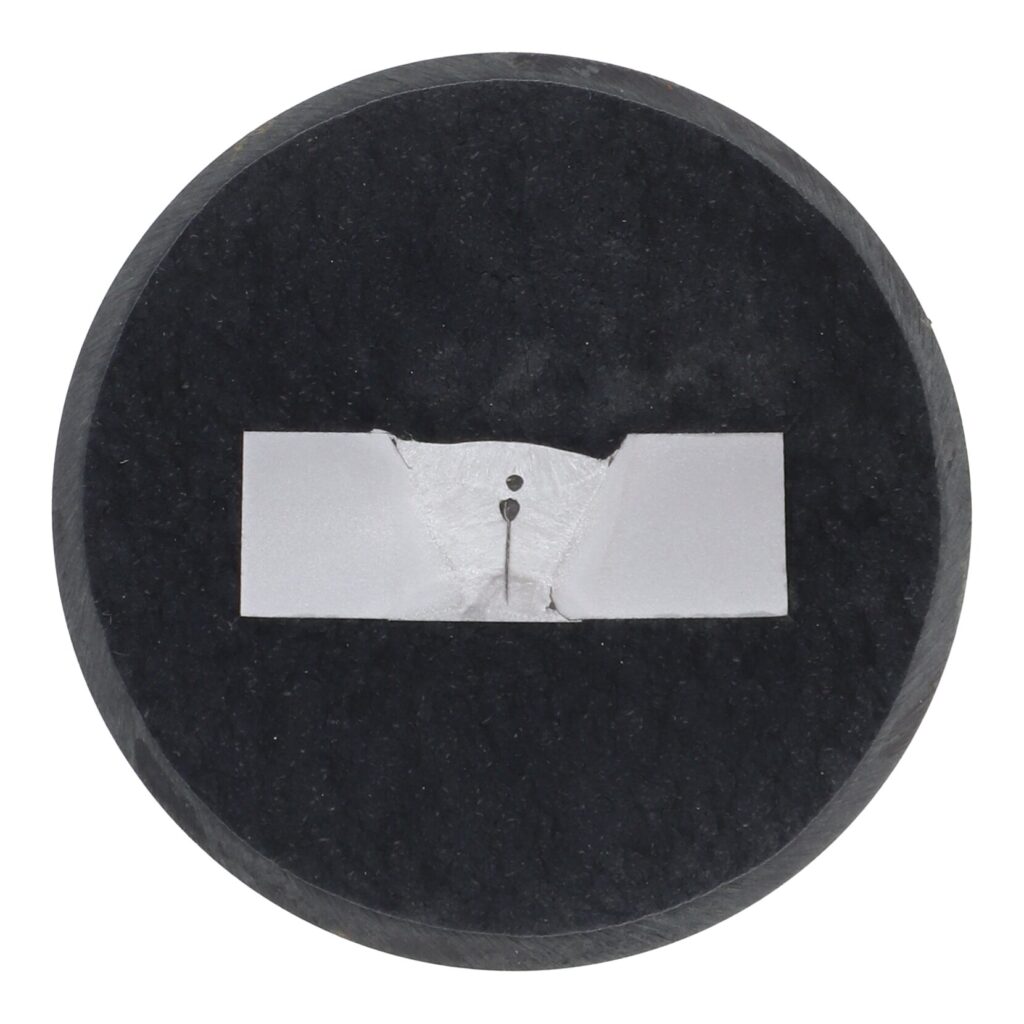
Macrosection of a weld seam with a crack
Other possible causes of heat cracks include:
- High internal stresses in the component
- Unsuitable filler metal
- Excessive component reactive forces
- Unfavorable welding parameters or seam geometries
How to prevent cracks
To prevent heat cracks, the welding parameters, filler metal, and workpiece preparation must all be coordinated with each other.
The following measures are also helpful:
- Ensure a balanced ratio between weld width and depth
- Attach components with as little stress as possible
- Use a suitable filler metal
- Take welding sequence and stress conditions into account as early as the planning stage
“The cause is often not one single error, but rather the combination of several unfavorable factors,” says Doblinger.
5. Undercuts
Undercuts occur when the base material melts locally, but the area is not sufficiently filled with weld metal. This creates a notch effect that can compromise the strength and durability of the welded joint. Undercuts can occur with both fillet welds and butt welds.
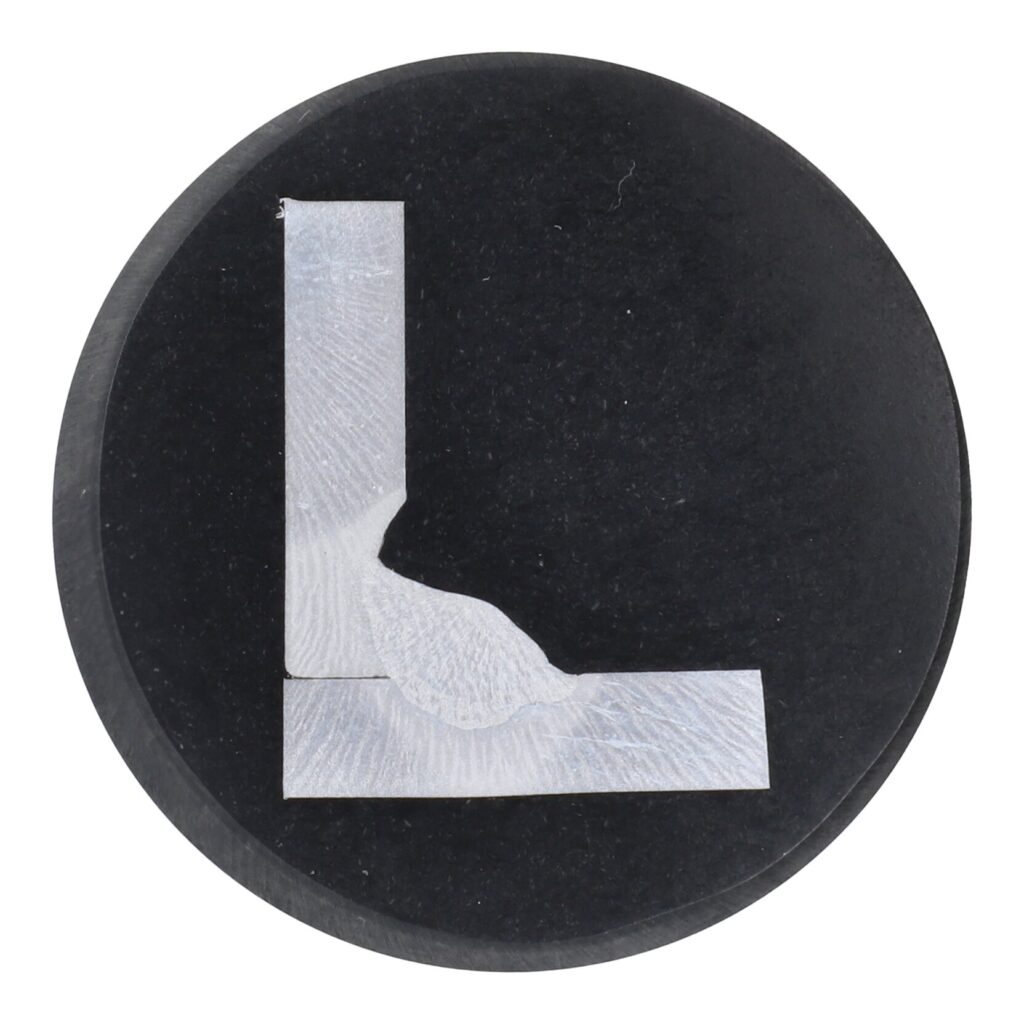
Undercut on the seam flank: the transition between the weld seam and the base material has a notch-shaped depression.
Excessive welding speed is a common cause of undercuts. If welding is performed too quickly, there is not enough time to deposit sufficient weld metal on the sides of the weld.
Insufficient lateral oscillation of the torch can also result in undercuts. As expert Doblinger says: “If the side-to-side oscillation of the arc is not large enough when producing a butt weld, material is melted away from the base metal but not sufficiently replaced. That’s what creates the undercut.”
Undercuts are also exacerbated by an excessively long arc, which is usually the result of an increased welding voltage as well as an unfavorable torch position or torch angle.
How to prevent undercuts
Be sure to match the welding parameters and torch guidance to each other. Günter Doblinger specifically recommends reducing the welding speed and ensuring an adequate weaving width.
The following measures are also helpful:
- Reduce the arc length and, consequently, the voltage
- Adjust the welding power to the material and seam geometry
- Check the torch position regularly and adjust it if necessary
- Match the welding power to the travel speed
- Visually inspect the weld edges regularly
Practical tip: Make sure the torch is in the correct position. For fillet welds, the torch should be held at an angle of about 45° whenever possible; for butt welds, it should be held as vertically as possible to ensure that weld metal is deposited evenly on both sides.
6. Excessive penetration and sagging
In the case of excessive penetration, the weld metal penetrates too deeply into the root of the weld and a clearly visible bulge forms on the root side (sagging). This defect occurs primarily in butt welds and is usually caused by excessive heat input, a gap that is too wide, or an inappropriate balance between welding power and welding speed.
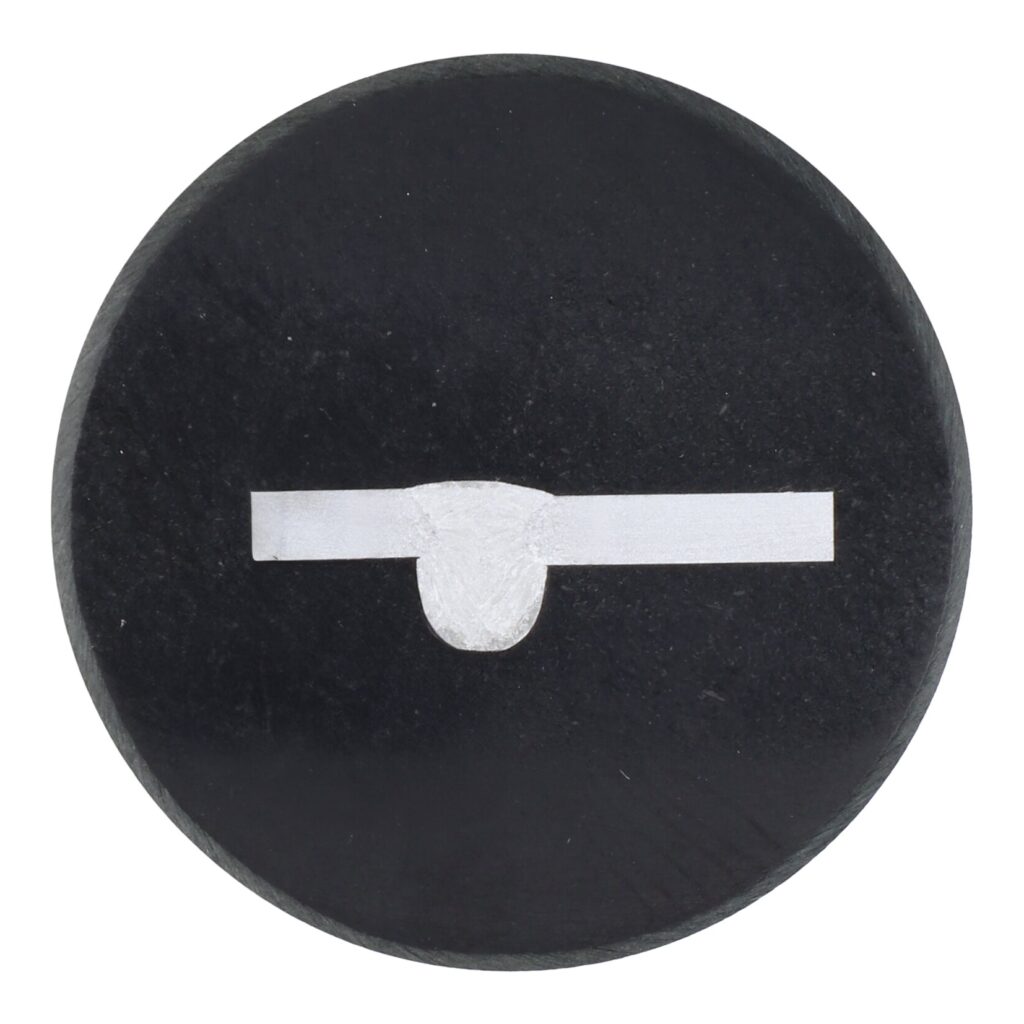
Excessive penetration occurs when too much weld metal is forced through the root.
How to prevent excessive penetration
To prevent root sagging, the heat input should be carefully adjusted to the material and the thickness of the component. Equally important is clean and precise seam preparation.
The following measures have proven effective in practice:
- Keep the gap within the specified tolerances as much as possible
- Ensure the root pass is sufficiently large
- Adjust the welding speed and amperage for the optimum balance
Carefully check the seam preparation and joining geometry
Practical tip: If the root side of a weld seam shows a clearly pronounced bulge, it is worth first checking the set welding power and the gap dimension. Root sagging can often be prevented simply by reducing the amount of heat applied or adjusting the gap opening.
7. Crater cracks
Crater cracks form at the end of a weld seam in the weld crater (that is, in the area left behind when the welding process is completed). Weld metal contracts as it cools, meaning fine cracks will form in the end-crater if insufficient metal has been applied.
Macrosection of a weld seam with a crater crack in the end-crater region.
The causes are:
- Significant shrinkage of the weld metal during cooling
- Reducing the welding power too quickly or shutting it off abruptly
- An insufficiently filled end-crater
- Pulling the welding torch away too quickly
- Lack of shielding gas flow at the end of welding
How to prevent crater cracks
Crater cracks can usually be prevented by a controlled termination of the welding process. The end-crater should be filled as completely as possible before the arc goes out.
The following measures can also help:
- Gradually reduce the welding power before the end of welding
- After turning off the welding torch, leave it in position for a moment
- Allow the shielding gas to continue flowing until the weld pool solidifies
- Select welding parameters so that the weld pool runs out in a controlled manner
Practical tip: The last centimeter of a weld deserves just as much attention as the rest of the seam. If you do not stop the welding process abruptly, but instead carefully fill in the end-crater and hold the torch in place for a moment, you can often prevent crater cracks before they even start.
8. Insufficient penetration
Insufficient penetration of a butt weld means that the root pass is not completely melted through. The weld metal has not penetrated far enough into the root gap and has not fully bonded with the base material.
Insufficient penetration of a butt weld
Insufficient penetration often occurs when the weld was not properly prepared. Common causes include a root face that is too high, a root gap that is too small, or an opening angle that is too small. In addition, insufficient welding power, excessive welding speed, or an unfavorable torch position can also prevent the weld metal from penetrating sufficiently into the root area.
How to prevent insufficient penetration
- Prepare the face height correctly
- Set the correct gap width
- Ensure stitch weld dimensions are adequate
- Select the required welding power
9. Excess reinforcement
In the case of excess reinforcement, the weld seam extends beyond the required dimension. The cause is too much deposited weld metal. Depending on the requirements, the raised seam may affect the component geometry and require additional rework.
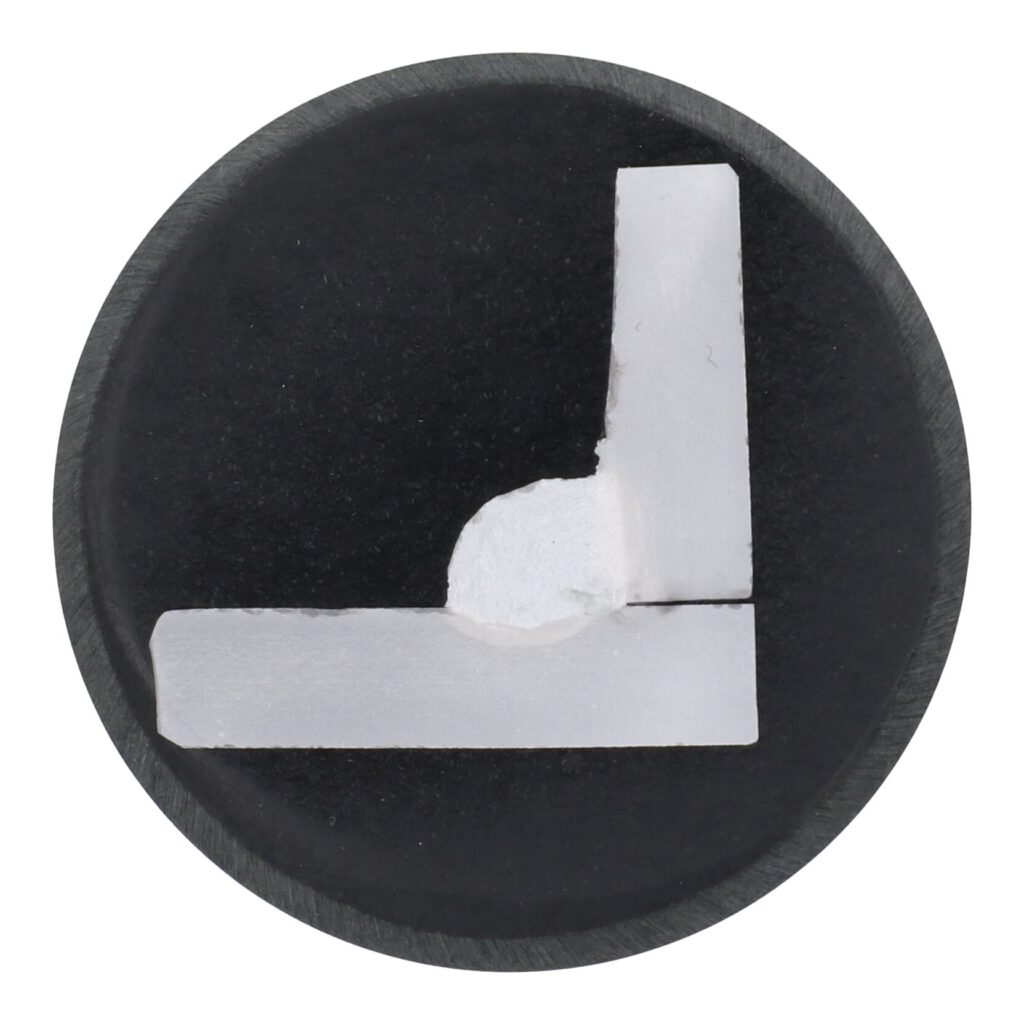
Excess reinforcement due to too much weld metal deposited during the welding process
Excess reinforcement often occurs when more weld metal is deposited than can be processed at the selected welding speed. The excess material cannot distribute itself evenly and accumulates on the seam surface.
Other common causes include:
- Too much filler metal
- Welding speed too low
- Incorrect position of the welding torch
- Welding parameters that are not in proper balance
How to prevent excess reinforcement
Günter Doblinger recommends always considering the balance of welding parameters (particularly welding speed, wire speed, and torch guidance) and adjusting them as needed. Oftentimes the weld seam profile can be significantly improved simply by making minor adjustments to the parameters.
The following measures have proven effective:
- Increase welding speed
- Use less filler metal
- Adjust the position of the welding torch
- Optimally match wire speed to welding power
10. Welding spatter
Welding spatter consists of small metal particles that are ejected from the arc or weld pool area during the welding process and adhere to the workpiece. Common causes include:
- Contaminated component surface
- Incorrectly set welding parameters
- Inadequate filler metal quality
- Unfavorable combination of voltage, amperage, and wire speed
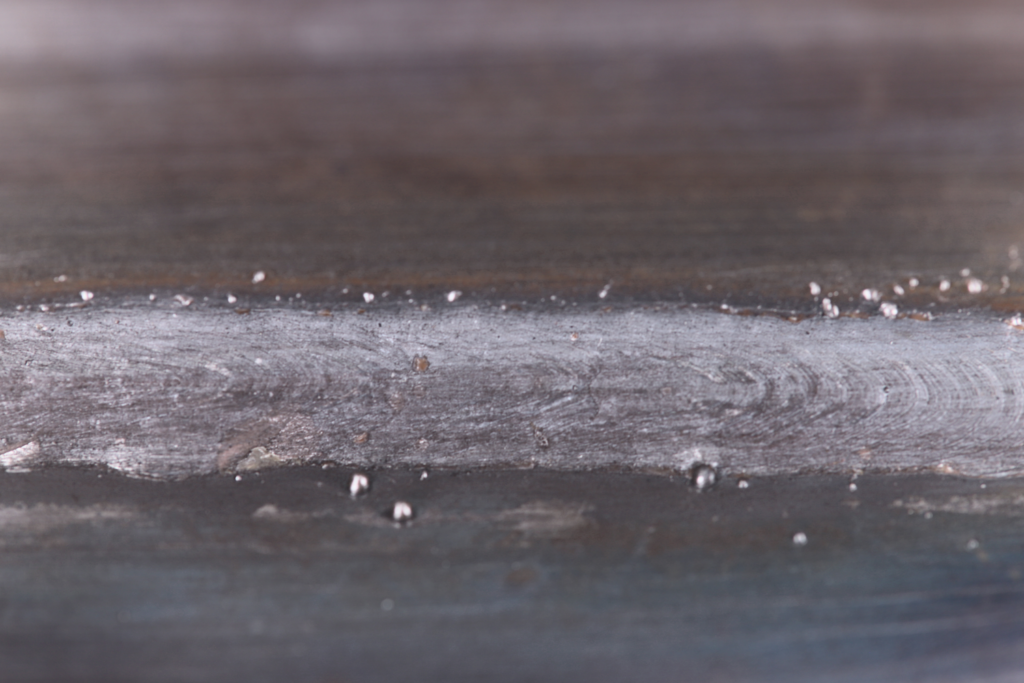
Example of welding spatter along a seam
How to prevent welding spatter
To reduce spatter, the welding parameters should be carefully adjusted to suit the base material, filler metal, and welding task. Equally important are clean workpiece surfaces and high-quality filler metals.
Additional tip: Since the causes and countermeasures are so varied, we have dedicated a separate article to this topic. See our blog post ”8 to prevent welding spatter” for all the details.
How can you identify welding defects?
External welding defects can be detected simply by visual inspection; these include undercuts, surface pores, or welding spatter.
For internal seam defects, non-destructive testing has to be used. Such methods include:
- Visual testing (VT): Visual inspection of the surface
- Penetrant testing (PT): Detection of surface-exposed defects
- Magnetic particle testing (MT): Testing of magnetizable materials
- X-ray inspection (RT): Revealing of internal defects
- Ultrasonic testing (UT): Inspection of internal imperfections
The distinction is particularly clear when it comes to pores: surface pores are visible, while internal pores can be detected through X-rays, for example.
How modern welding machines help prevent welding defects
Modern welding systems can help reduce common sources of error through stable arc processes, appropriate welding programs, reproducible parameters, and digital assistance features that support welding professionals in their work.
Fronius manual welding machines, robotic welding solutions, and automated welding systems help to standardize welding processes and increase process reliability.
Nevertheless, the welding machine alone is not the deciding factor. Torch guidance, condition of the wear parts, shielding gas supply, and workpiece preparation all play an important role too.
Conclusion: understanding the causes is the key to preventing welding defects
In addition to appropriate welding technology, the experience and attention to detail of the welder also play a significant role in the quality of a weld. “The importance of thorough preparation is regularly underestimated. Mistakes often do not occur during the welding process itself, but rather during the preparation and setup of the workpieces. It is also crucial to understand the typical welding defects and their causes, because only if you know how a defect is caused can you improve seam quality and avoid costly rework,” Doblinger concludes.
Would you like to delve deeper into the world of weld seams? Our blog post “Welding 101: The different types of welding joints and seams” contains all you need to know. Have fun exploring!
FAQs on welding defects
Why is weld seam quality so important?
The quality of a weld seam is critical to the safety, strength, and service life of a component. What matters is not only the external appearance, but above all whether the required mechanical, geometric, and quality specifications are met. Welding defects can reduce joint strength and, in the worst case, lead to cracks or failures.
Which welding defects are particularly critical?
Defects such as insufficient penetration, a lack of fusion, or significant internal defects are particularly critical, as they can compromise the strength and operational safety of a component. Whether a defect is acceptable or not depends on the application, the material, the quality level, and the applicable standard.
What are some common welding mistakes that beginners make?
Common beginner mistakes include incorrect torch positioning, incorrect distance from the workpiece, unsuitable parameters, insufficient workpiece preparation, incorrect shielding gas flow, and uneven torch movement. These factors can cause porosity, undercuts, a lack of fusion, or asymmetrical seams.
Which welding defects result in the highest follow-up costs?
Defects that are not discovered until after production or during operation can be particularly costly. In such cases, rework, component replacement, production downtime, or even component failure can result in significant costs.